COMPOSITION
Other Elements of Composition 2
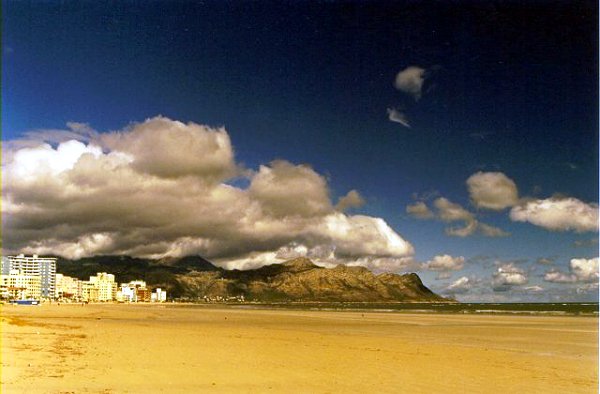
This photo of mine of the
beach at the Strand, near Cape Town, illustrates a further
aspect of composition: the use of light and dark areas. Notice how the lighter
zone
of the buildings and the paler part of the clouds on the left are balanced by the dark
blue
of the sky, both on the horizontal and diagonal. (The dark blue of the sky,
incidentally,
is the result of using a polarizing filter on a 35mm SLR camera.)
The same balanced use of light
zones can be seen (more subtly) in the next image
(by Tony Richardson) of Loughrigg
Tarn in the English Lake District
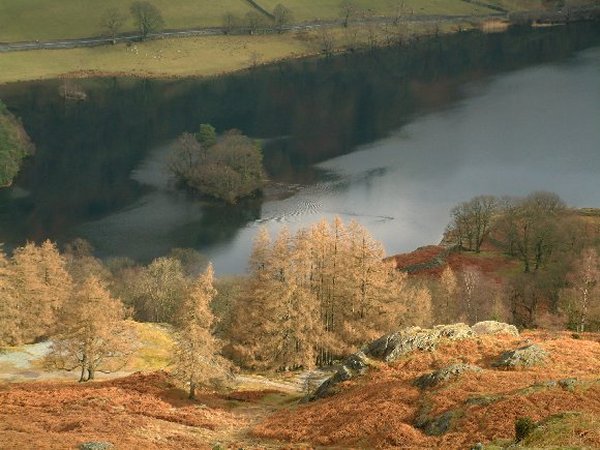
Here we not only see the use of light and dark areas, but also of colour, something we will look into again later.
Another tool we have at out
disposal to enhance the composition of our images is the use
of
"frames", by which I mean using elements of the landscape, or
the setting in which we
take our photograph, to frame the main point of
interest. A good example can be seen in
this photo by Peter Thomas...
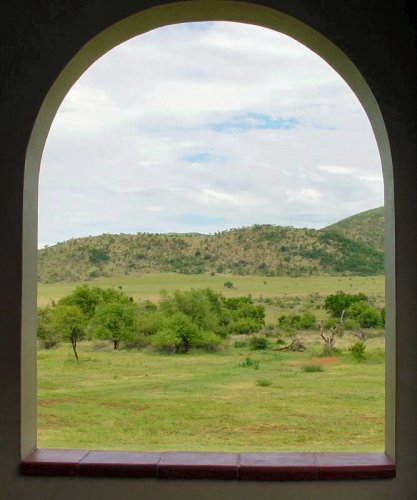
It is, though, a tool to be used with care and one needs to resist the temptation to over-use it! One possible problem that can arise here is that the frame, an archway in a wall in this case, can fool the camera's light meter. If the "frame" is much darker or lighter than the scene we look at through it, and if there is enough of it in the shot, we may have to use a flash technique called "fill flash" in order to balance the exposure. We will look at that later. Of course it is also important to remember that a frame cannot make an uninteresting view more interesting, so don't get too carried away by the frame and forget that what you actually want to show is what is "framed"! We are dealing with ways of enhancing a photograph of something that is worthwhile photographing, remember, so what is inside the frame also needs to conform to the rules of composition.
These, then, are the basics
of composition. The best way to master them is to put them into practice
every time you take a photograph. At first it is a mental exercise, yes,
and a bit of a slog, but the more you do it, the easier it becomes.
Another good exercise is to study photographs that really appeal to you.
Analyse them and see if you can put into words why these images have an
impact on you.
Becoming a better photographer is all about thinking about what you are
doing.
Another point to remember, and I pass it on as a truly excellent
photographer by the name of Jean du Plessis gave it to me when I first
started taking my hobby seriously in the early 70's:
Look AT your viewfinder, not merely THROUGH it. It is all too easy
to get so involved in a stunning landscape or a beautiful model that we
forget that we need to have a very close look at what we have in the
viewfinder, and that is where the shot is made or marred!
If you want an assignment now, go out and take your very best shot at making a stunning image, and then e-mail it to me after you have resized it to 600 pixels wide and done whatever you feel is necessary to the result of your labour. I will look at it and give you feedback, and all in private, so you need not be shy. Also, to force you to really think hard about what you are doing, I am restricting you to ONE image per assignment! Tough, eh? Well, I wasn't a drill instructor for nothing!
At the end I will set up a special FineEye Album with the best of your best photographs; the ones you will send me once you are satisfied that there is absolutely nothing more you can or want to do to them.